BUILDING A COB OVEN
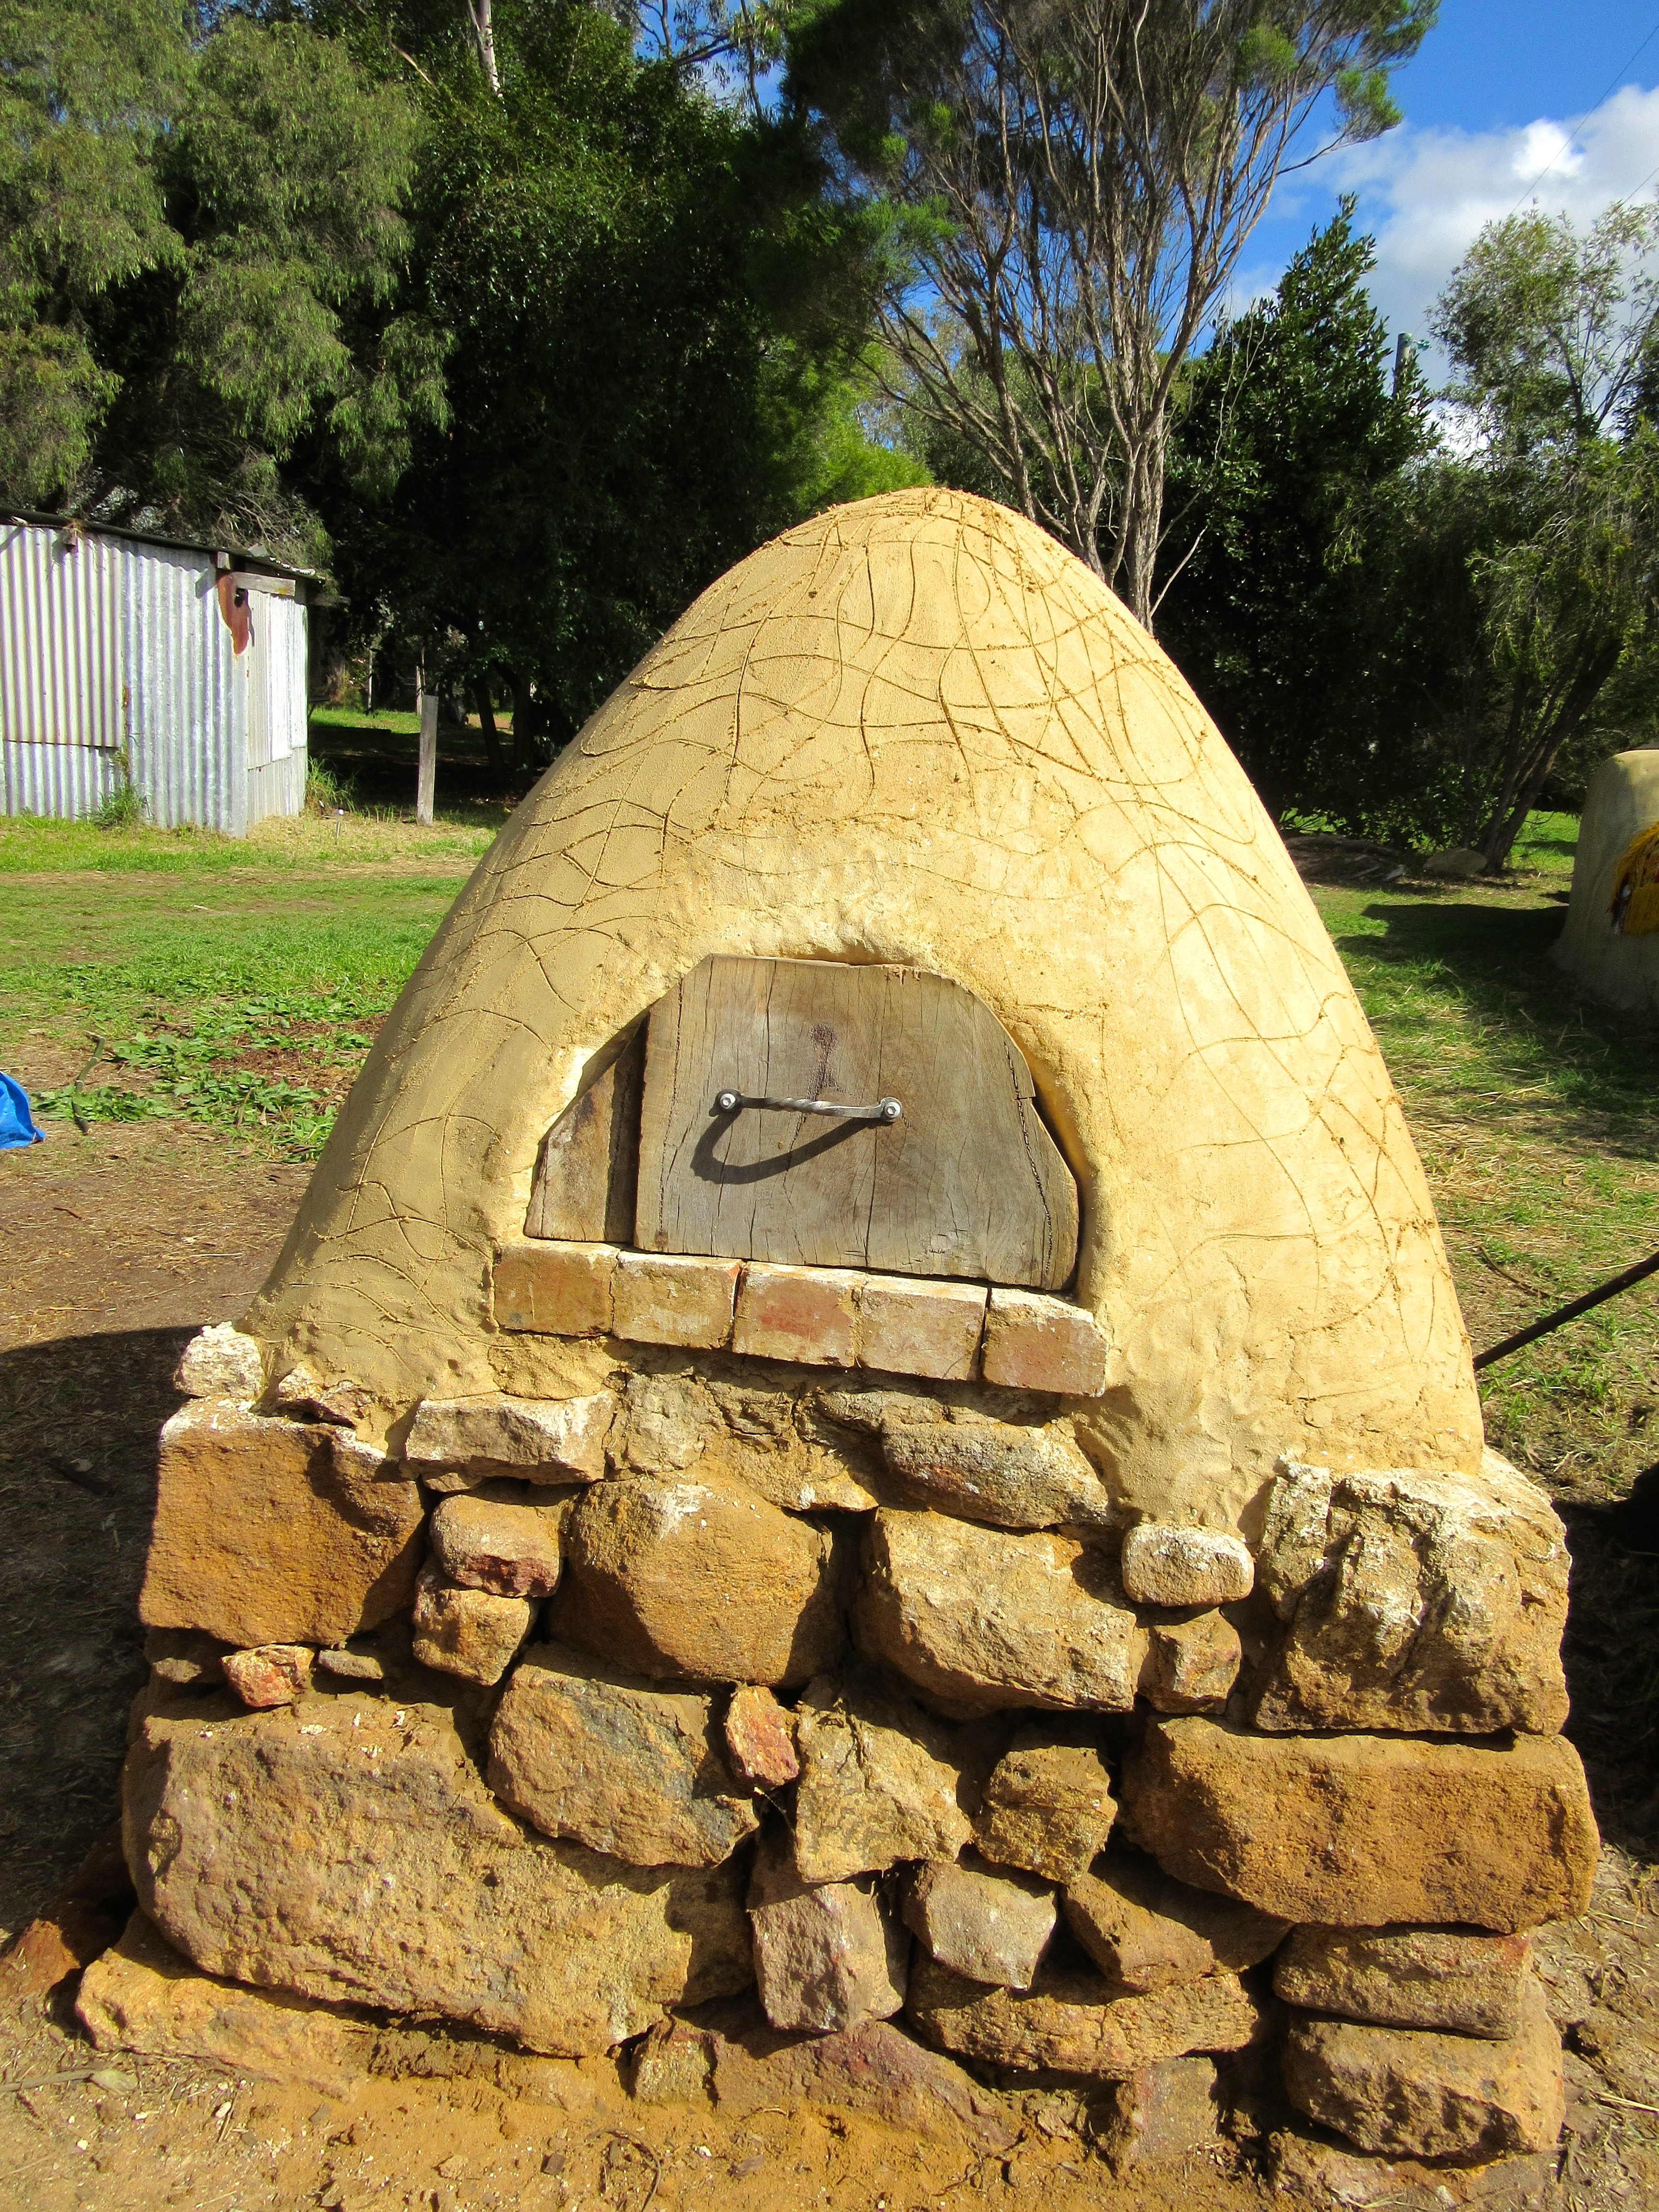
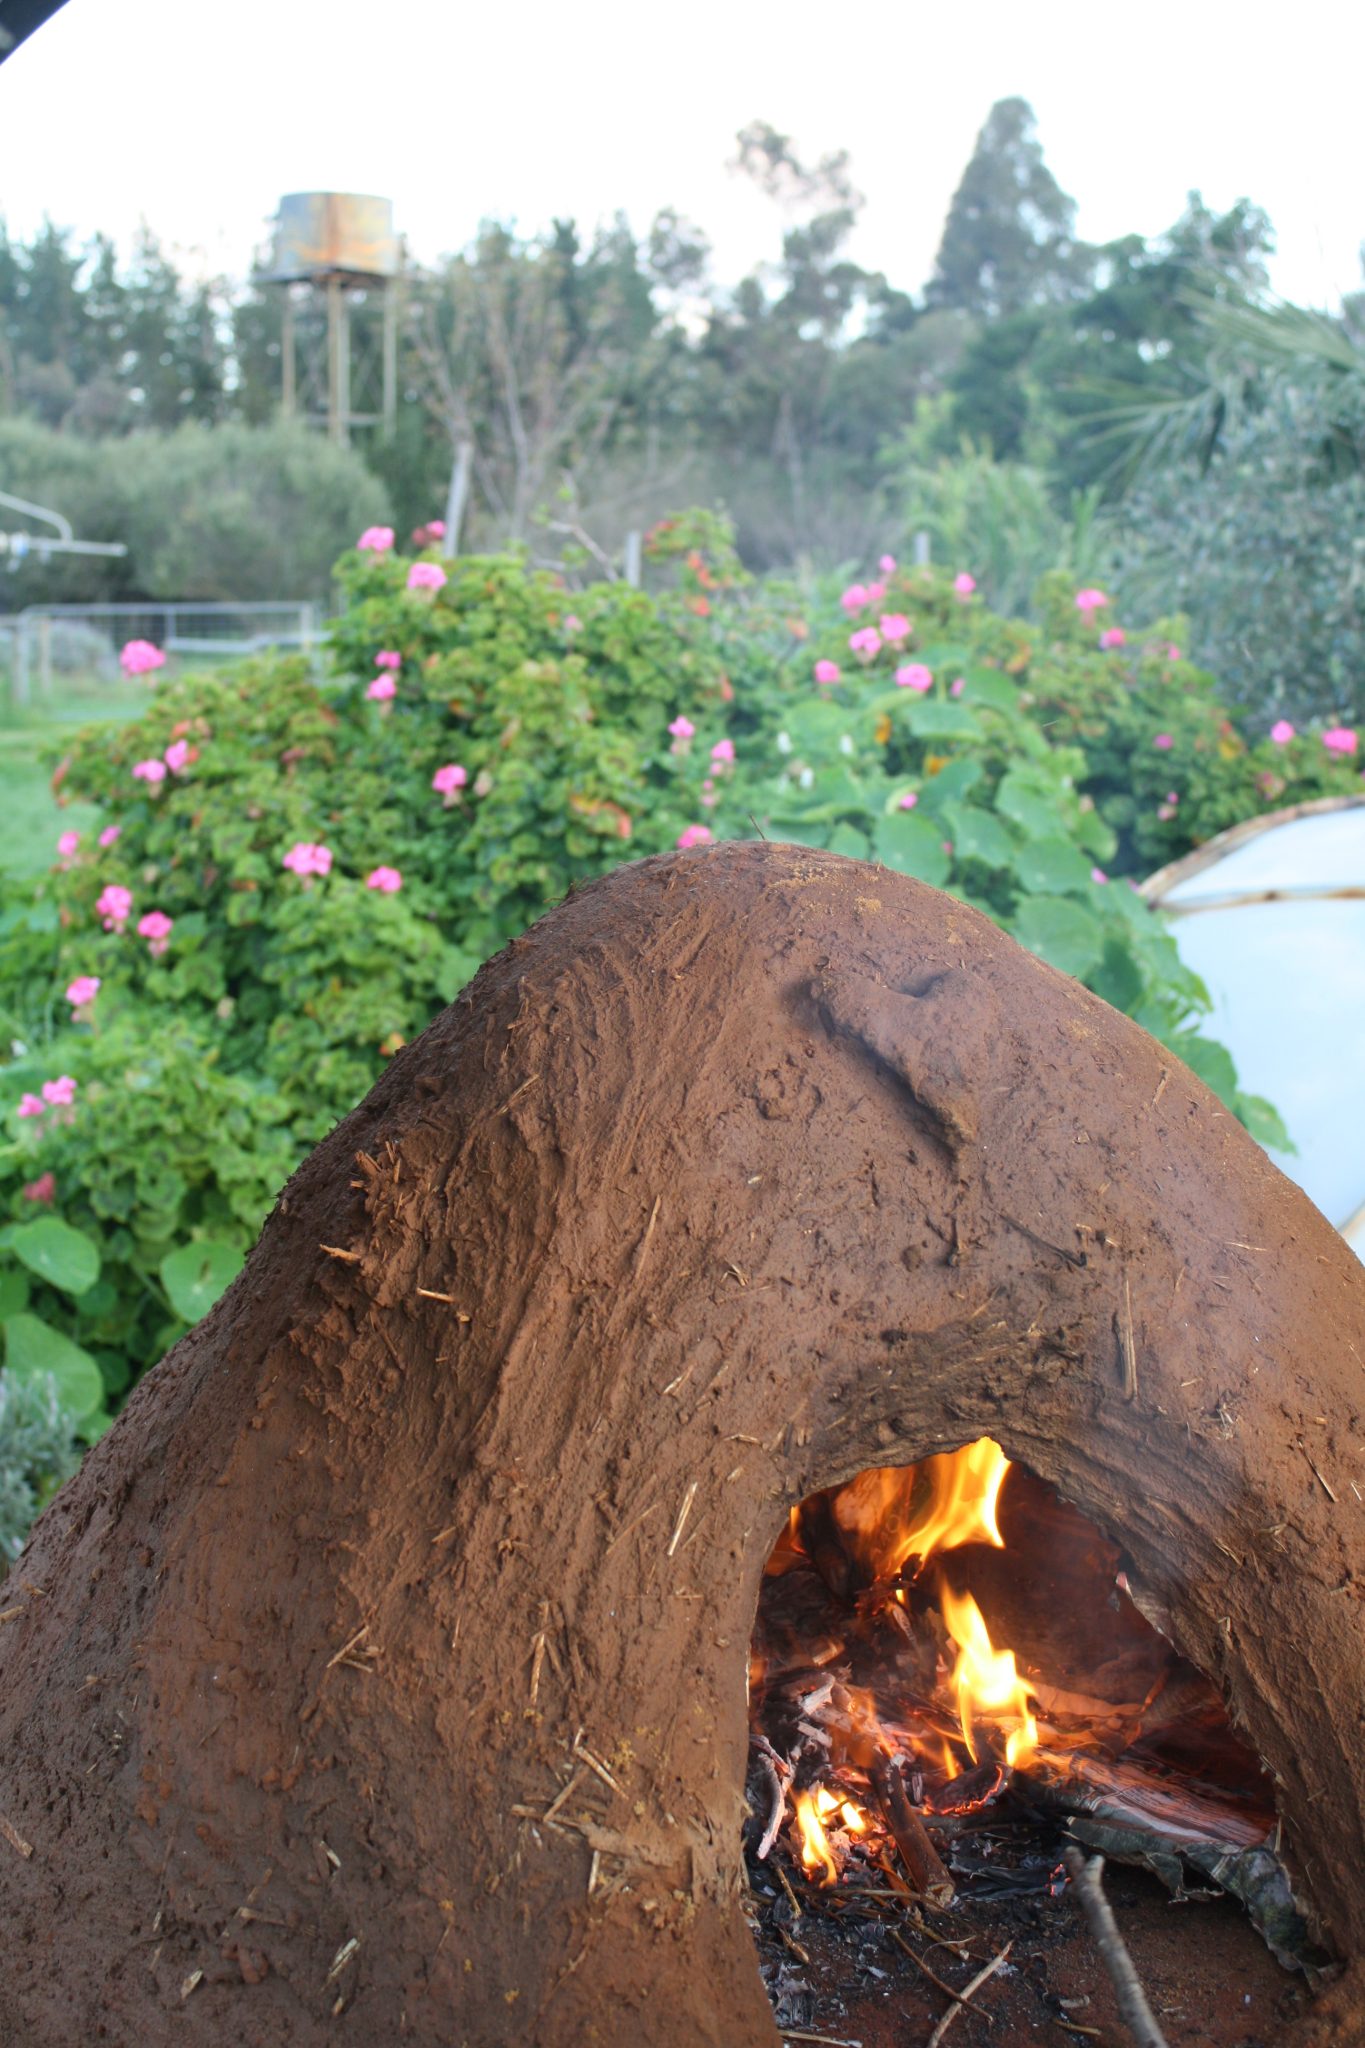
The finished Product!
One of the most exciting things about a cob, is that it is using materials collected from the property including, clay, sand, straw, rocks and recycled materials.
It is one of the oldest building methods on the planet and has a tiny carbon footprint. It also can be made with unskilled labour, although having someone to give you advice that has done it before is a good move.
We decided to build a cob oven, partly because we loved the idea of having an outdoor, communal pizza oven and partly because we wanted to experiment with cob building. A pizza oven is a great place to start and as we have found out, pizzas are just the beginning of what you can cook!
The steps:
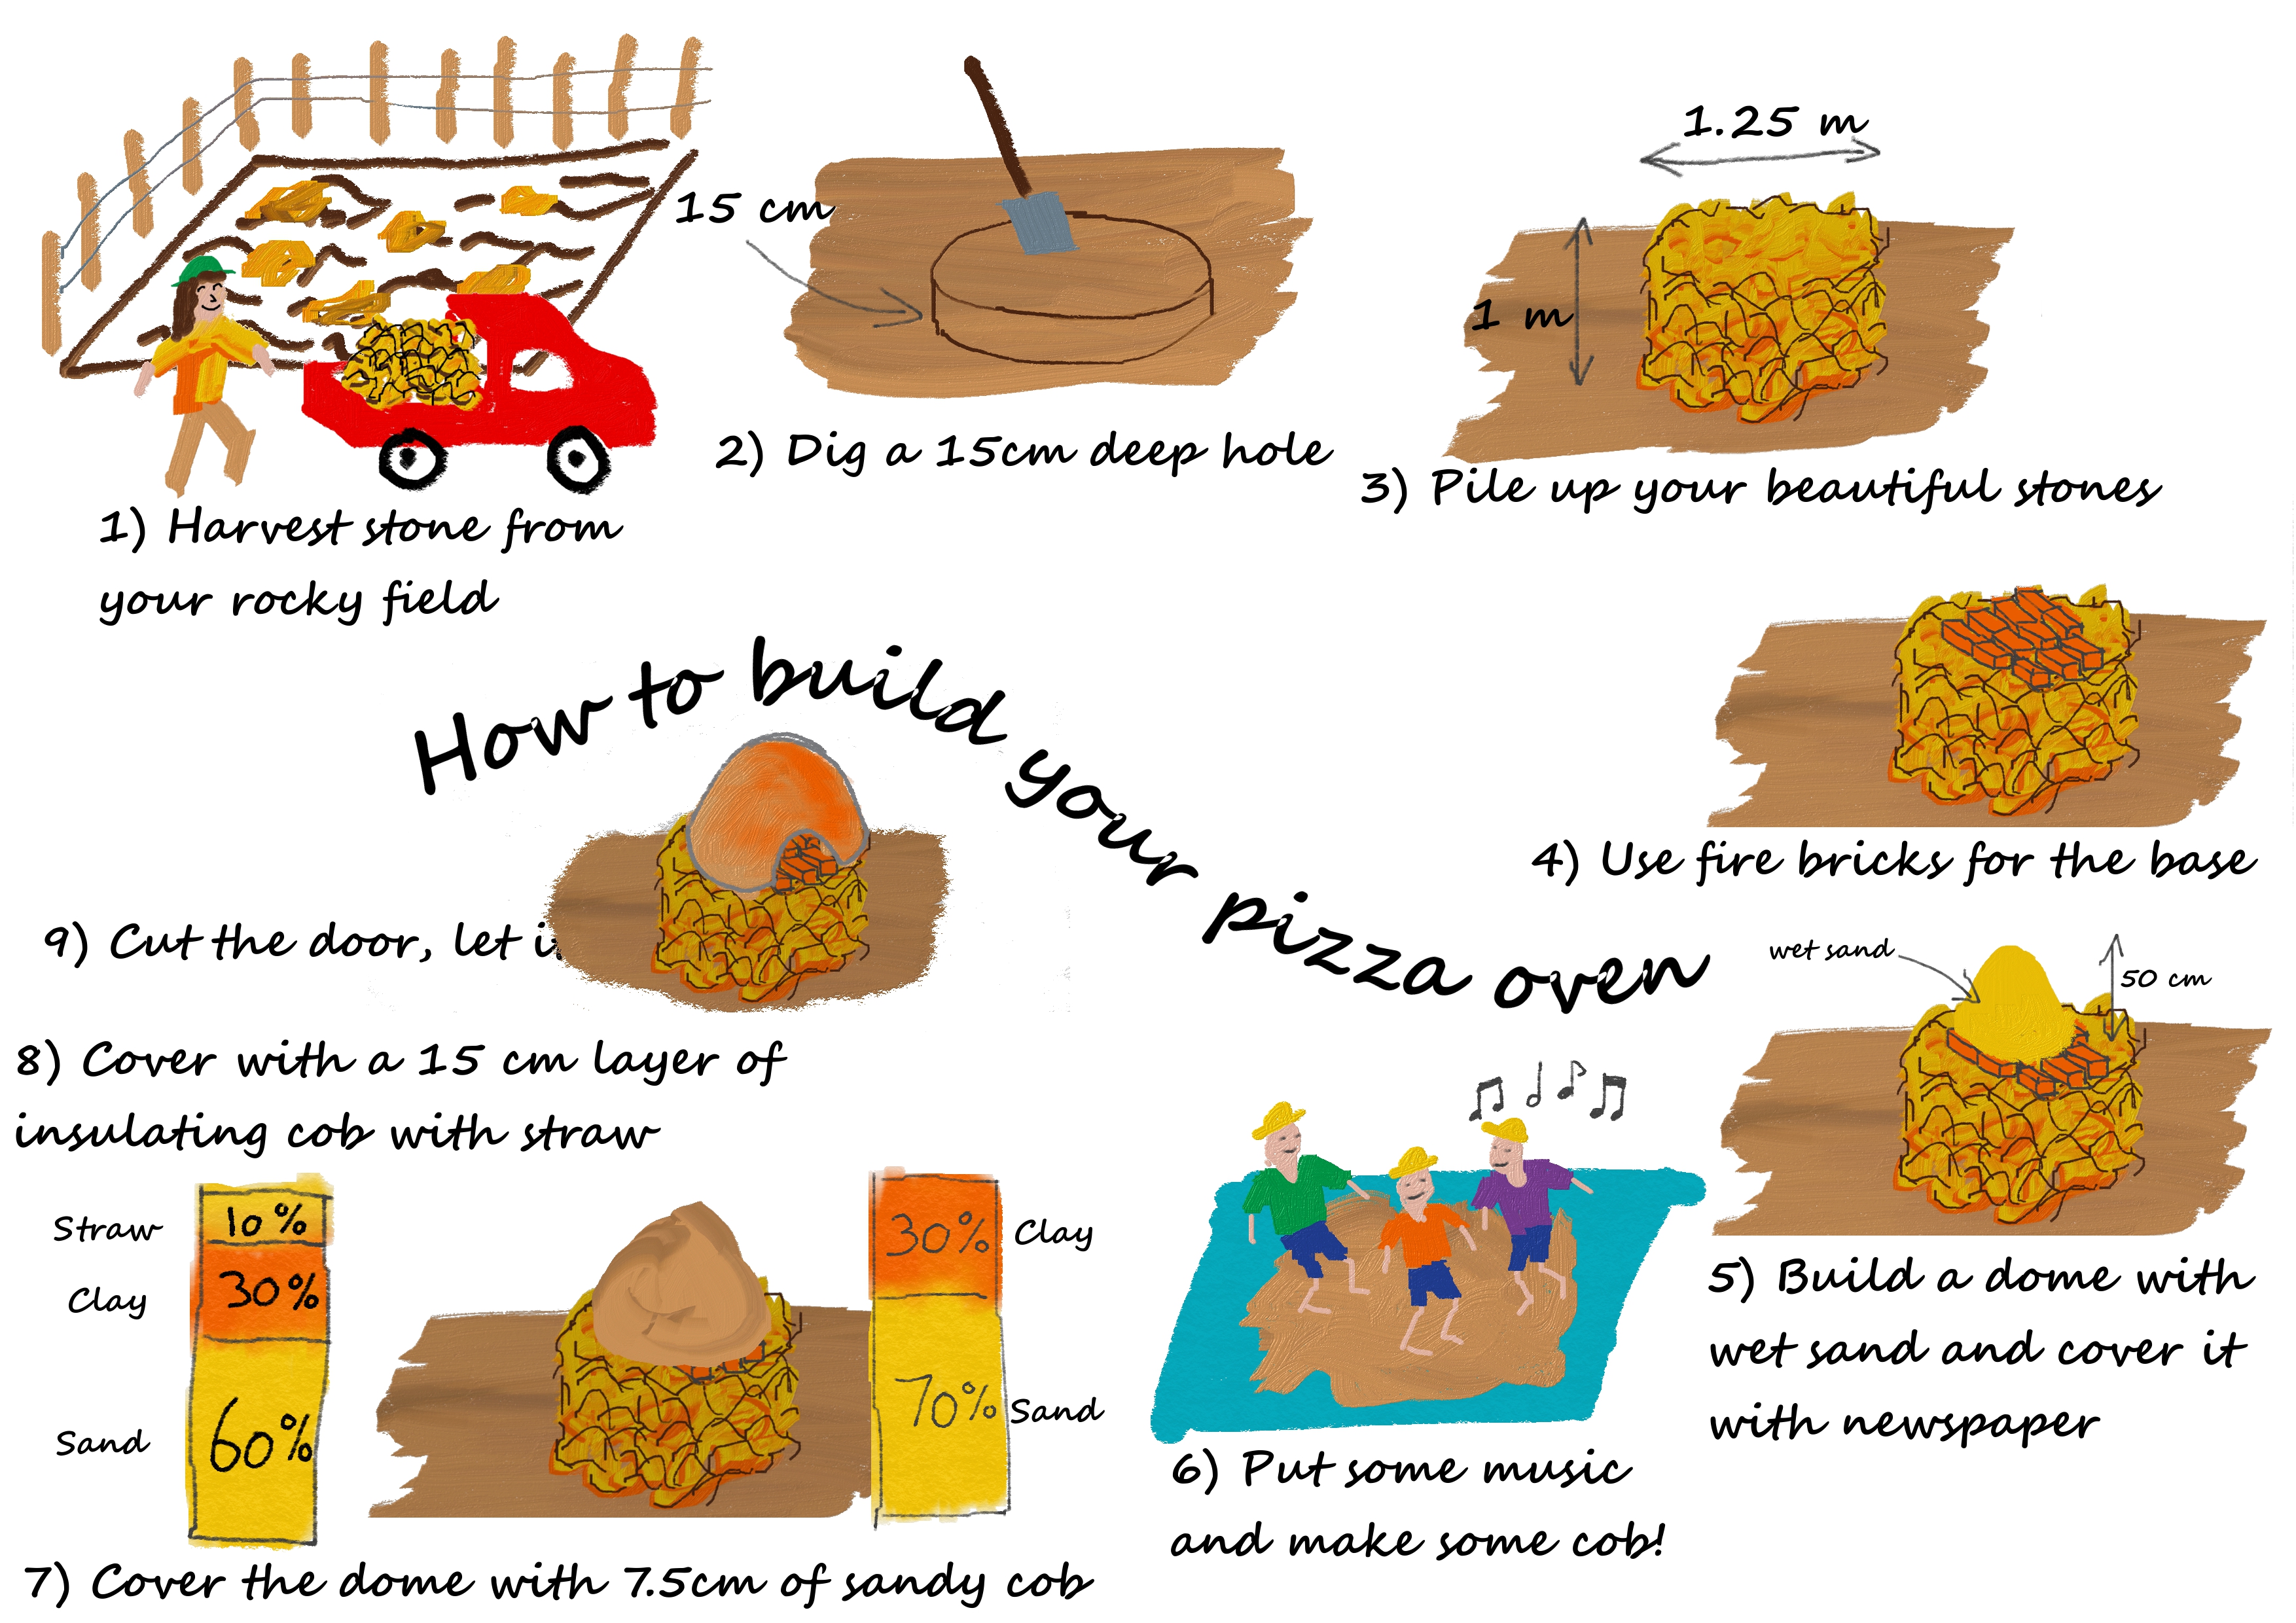
Choose your site –Choose a good flat site with good access. This is not just for building, but for wood collection and storage. Make sure the cob is built relatively close to amenities such as water etc.
Determine the size of your cooking oven – To decide what size your base should be, first think of the smallest size hole that will contain all the coals of your fire PLUS your pizza or one or 2 loaves) this is the inside of your oven. Now, imagine a 20cm thick (minimum) cob surrounding this, this will give you the size of your base.
Dig the foundation –Dig a 15cm deep hole the size of your (agreed) base to be the foundation and fill it with rocks and gravel.
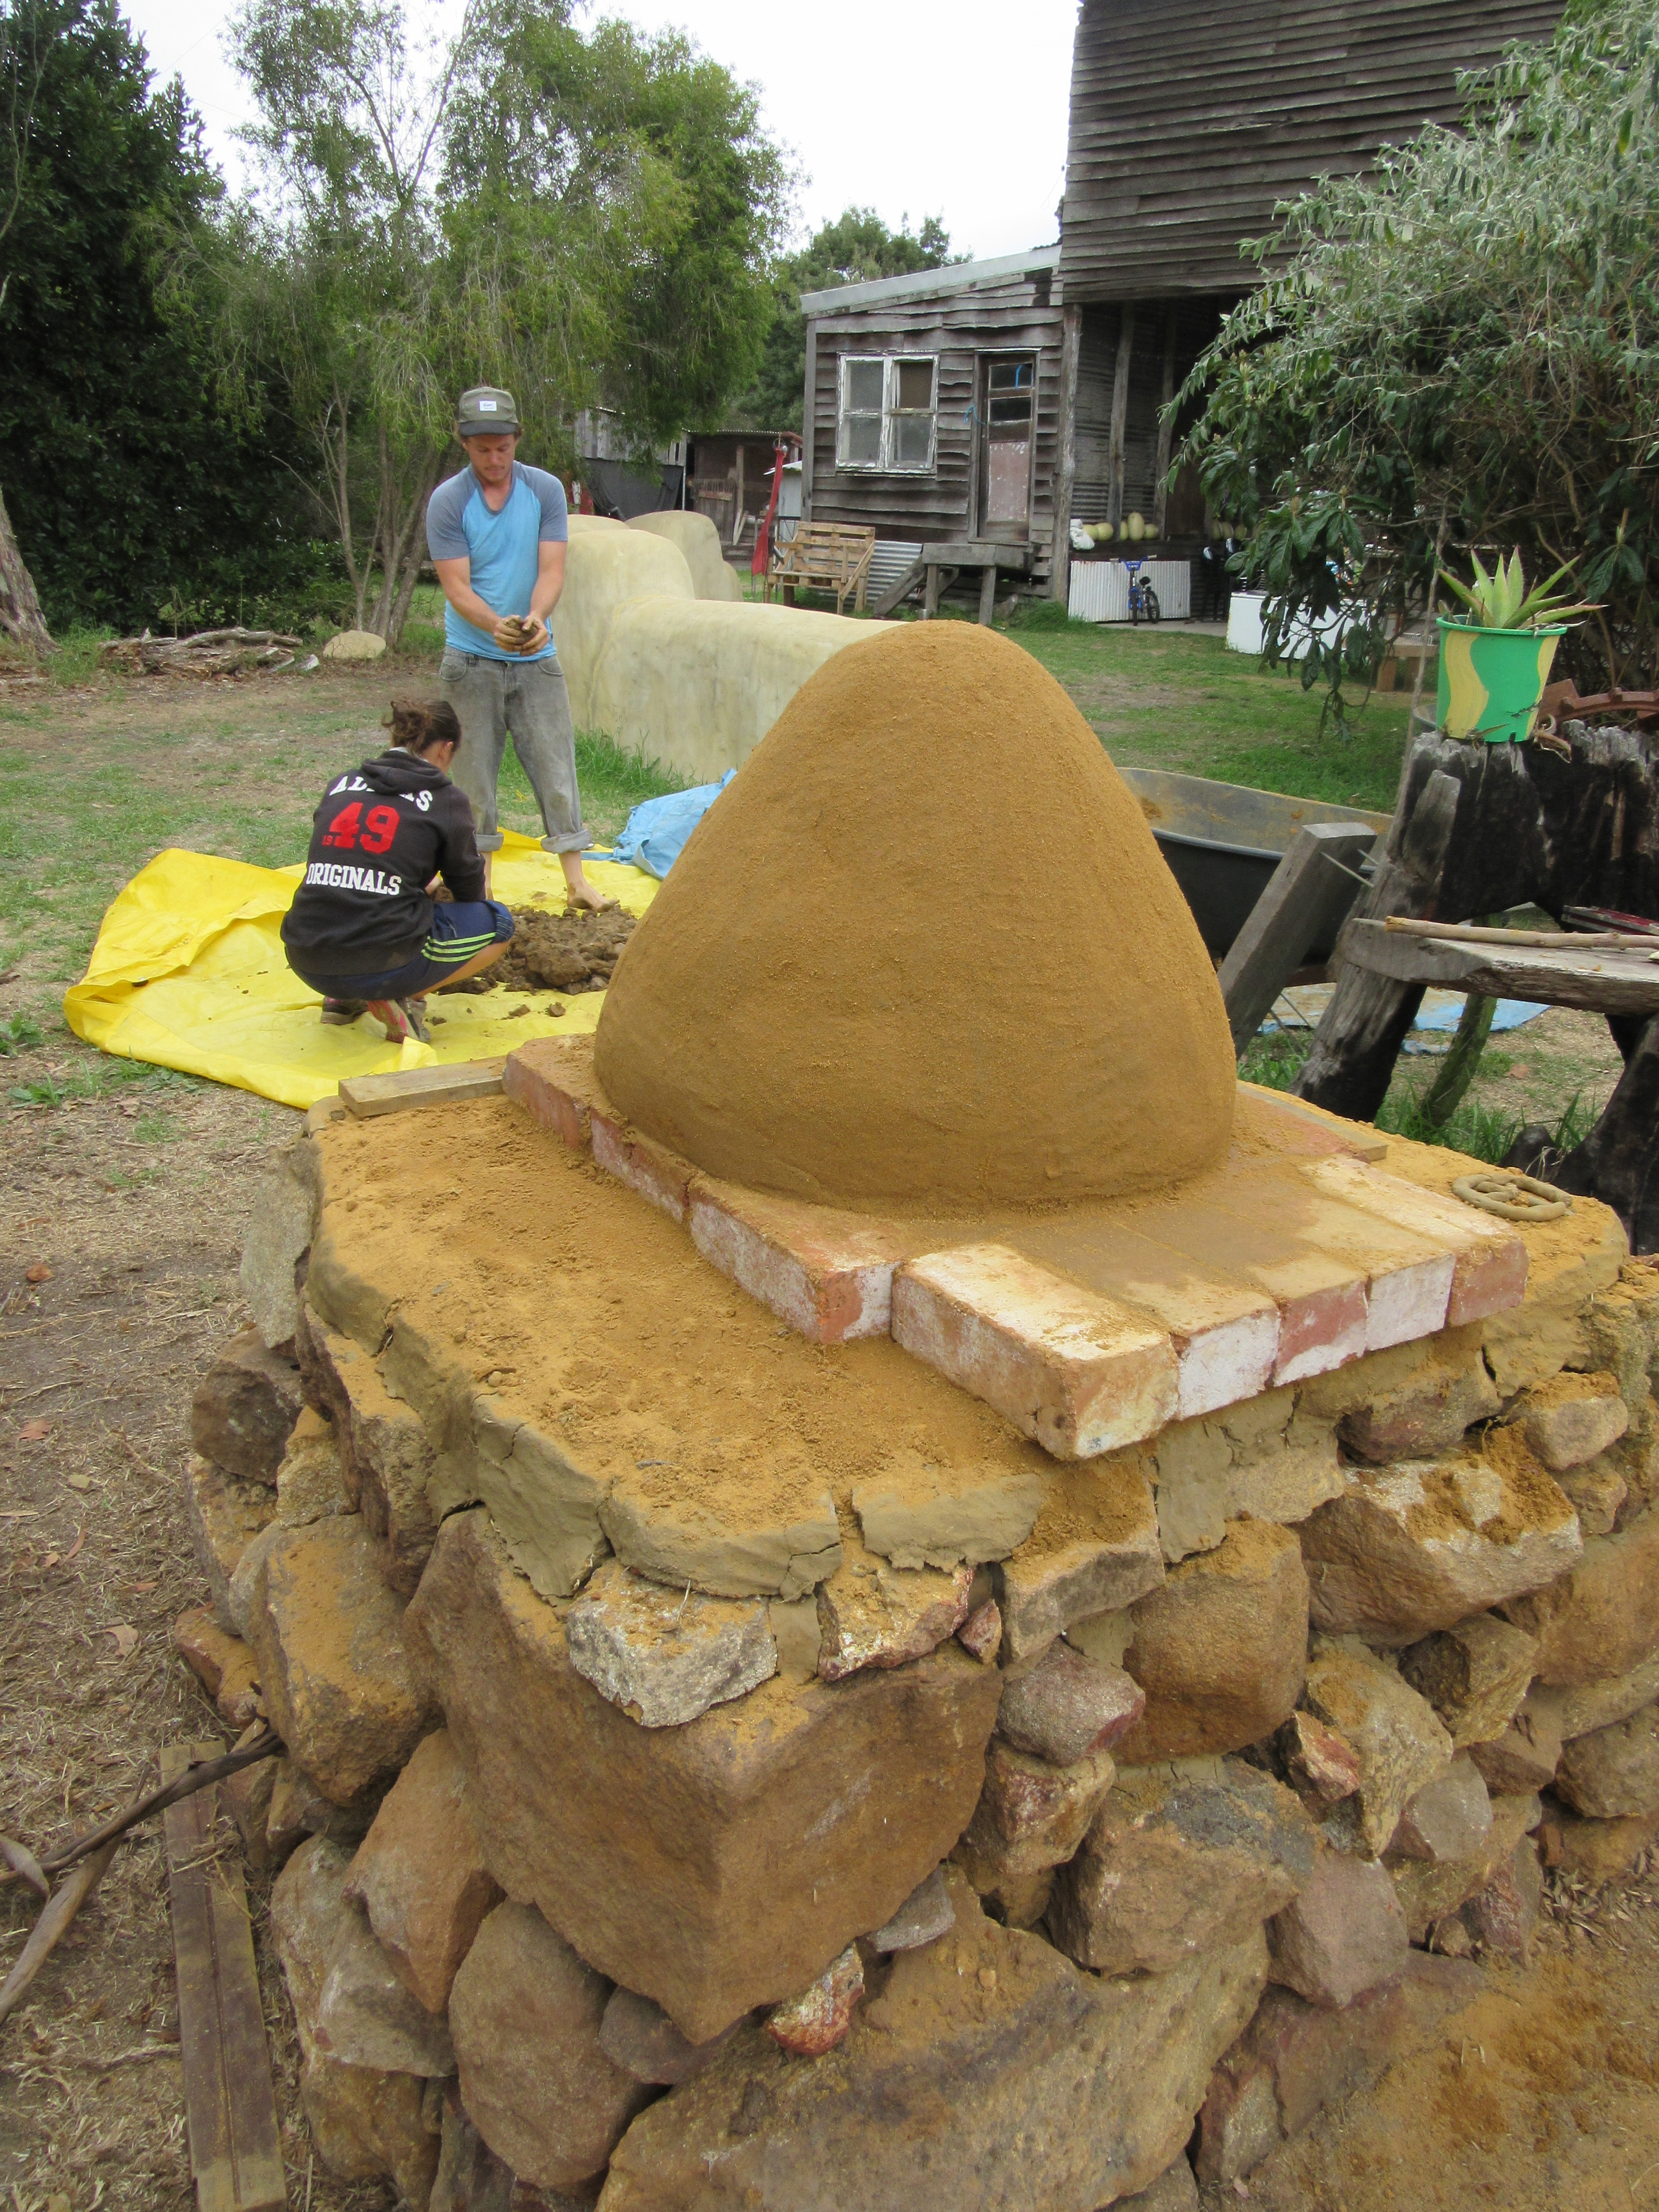
Build the fire proof foundation –Build your solid, fire proof foundation or platform to a comfortable working height. This level should be just below your waist. Use rocks, earth and cob and ideally recycled wine bottles for the foundation. If you fill the inside with wine bottles lying horizontally, they will create an excellent insulting layer and you won’t lose any heat from the base.
Cover the base –Cover the base with a good flat layer of mud and builders sand or fire bricks for insulation.
Building the sand form
Scultping the inside of the oven – Using damp sand (you may need to mix with a little clay) sculpt the shape of the INSIDE of your oven. It is important to think about what size the door will need to be. We got our favourite pizza tray out and measured it against the sand form. Remember that this sand form shape needs to be in the middle of your firebrick!!
Cover the sand form with wet newspaper
Make your cob mixture – Now the real fun starts…….make your cob mixture. This will depend entirely on your local soil, clay, sand mixture. Some
people are lucky enough to have the right mud mixture in their garden! What you are trying achieve is approximately two parts clay to one part sand. The best way to mix it is with your feet! When you have a good mix, cover the newspaper with a good thick layer of this mixture (7.5 cm) at this stage the clay/sand mix (adobe ) is better without straw.
Adding the straw
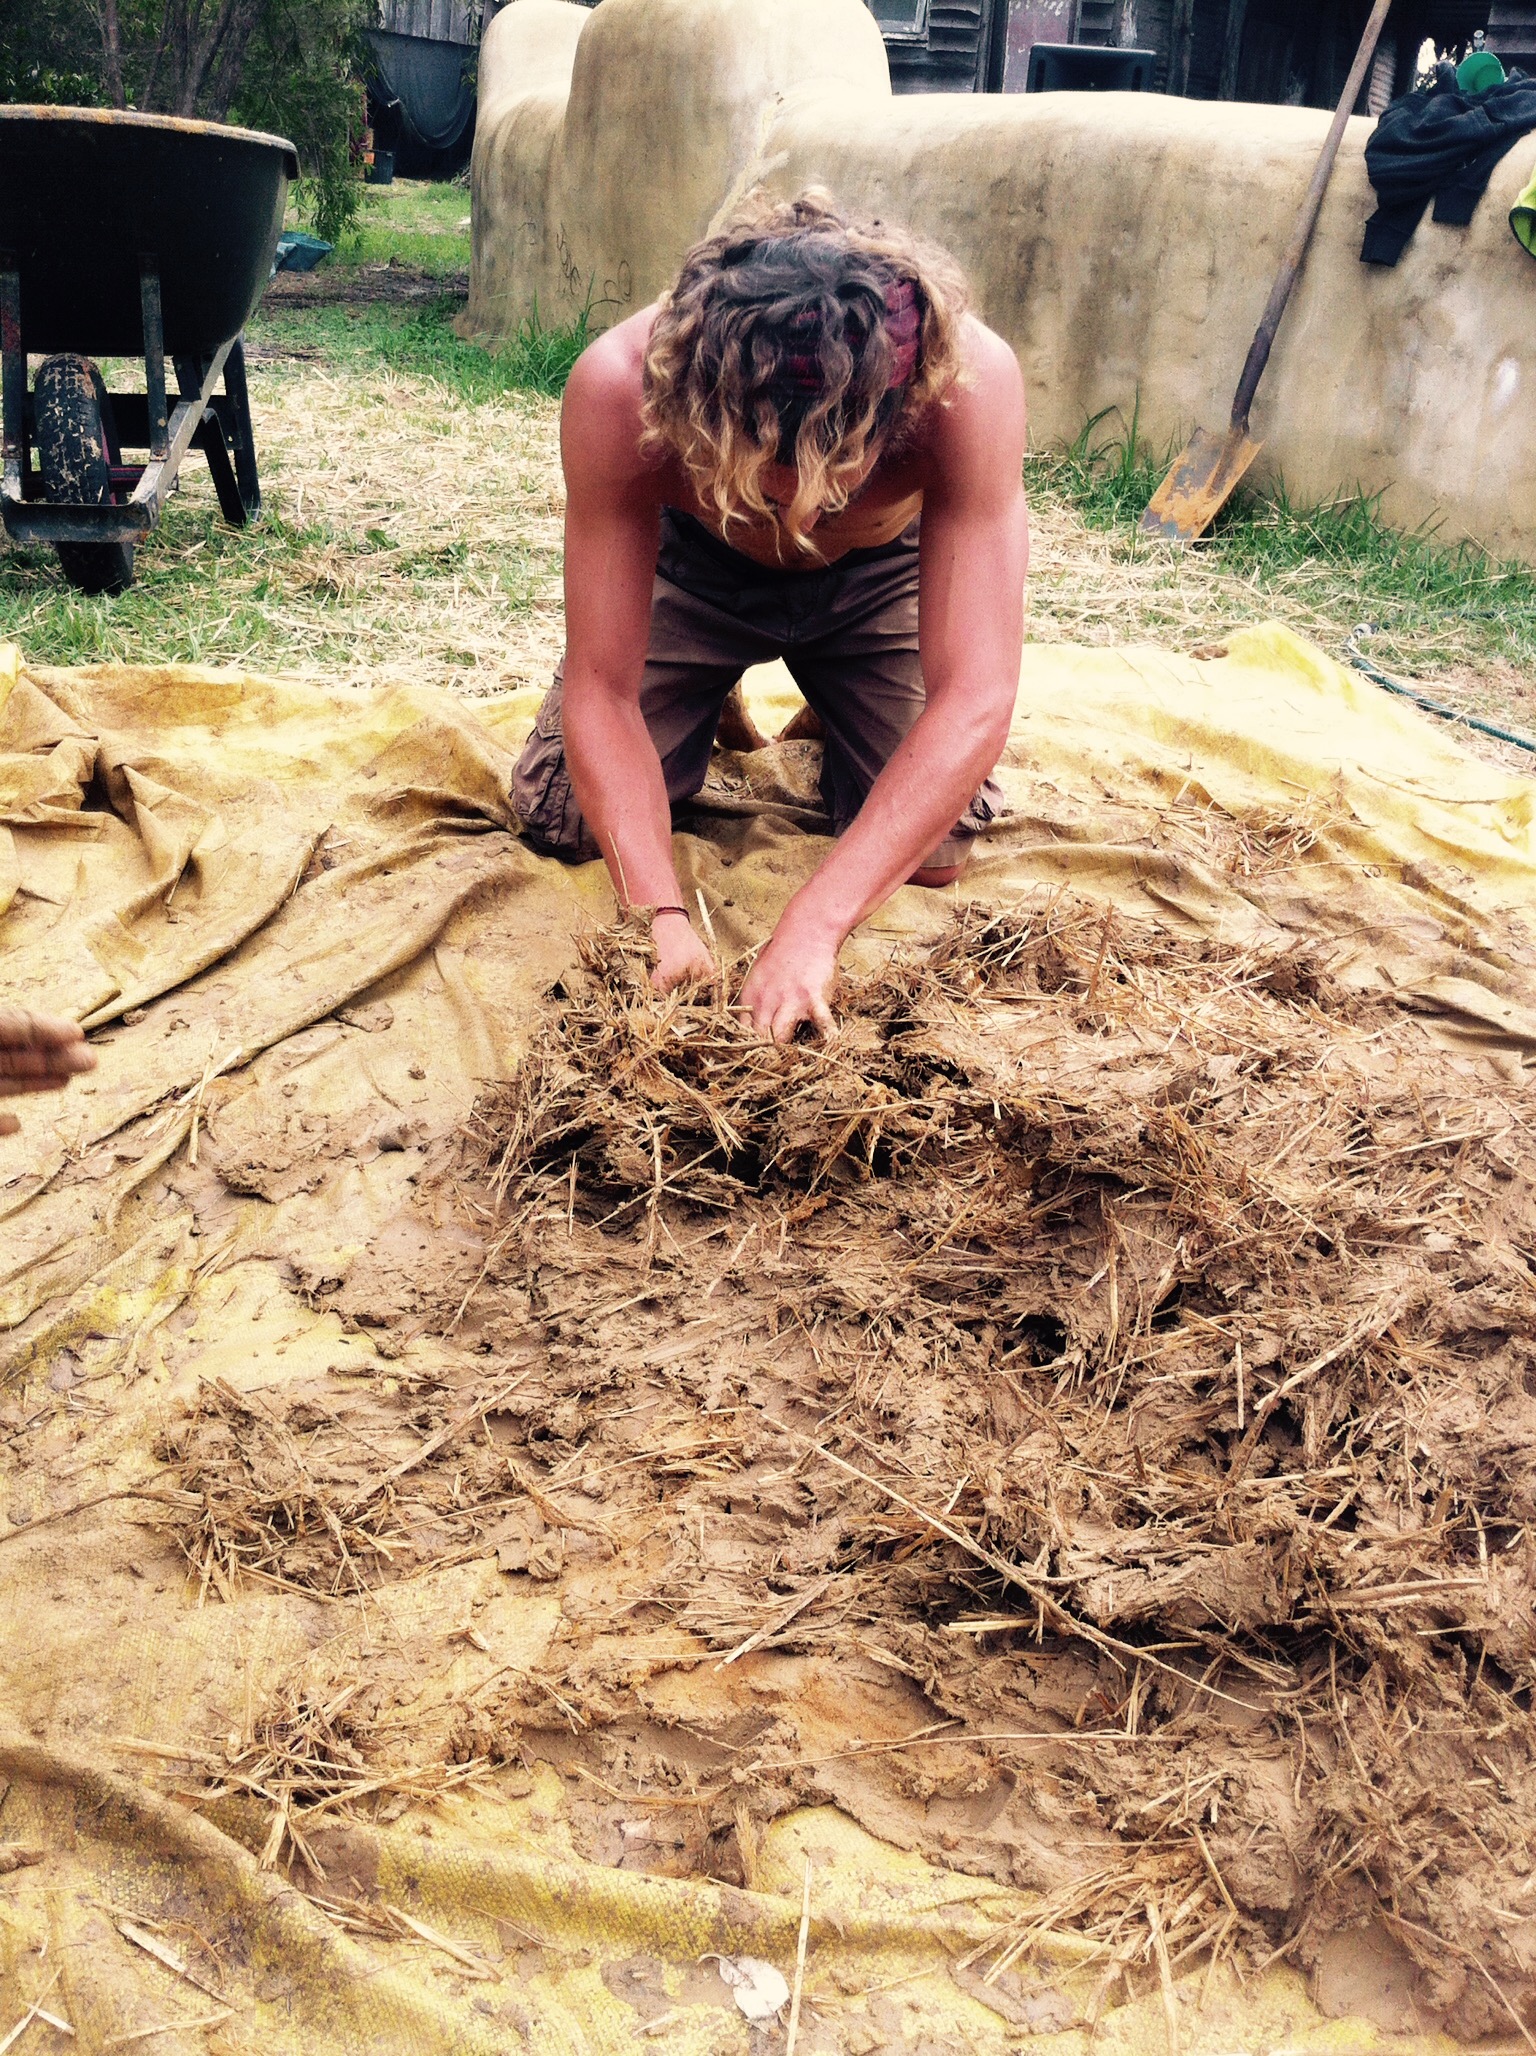
Add Straw – Next, add as much straw (needed for insulation) as the clay / sand mix will take. There is a lot of footwork involved, (this is a really great time to call in your experienced cob building friend). When you have a well combined mixture it’s time to create balls (or bricks). Each wet brick will be added around the structure, slowly building up the layers. Mould the bricks into each other so that there are no apparent seems.
Build! Continue to build your layers of bricks (balls). We did three coats, letting each one semi-dry before adding the next layer. For adhesion purposes,
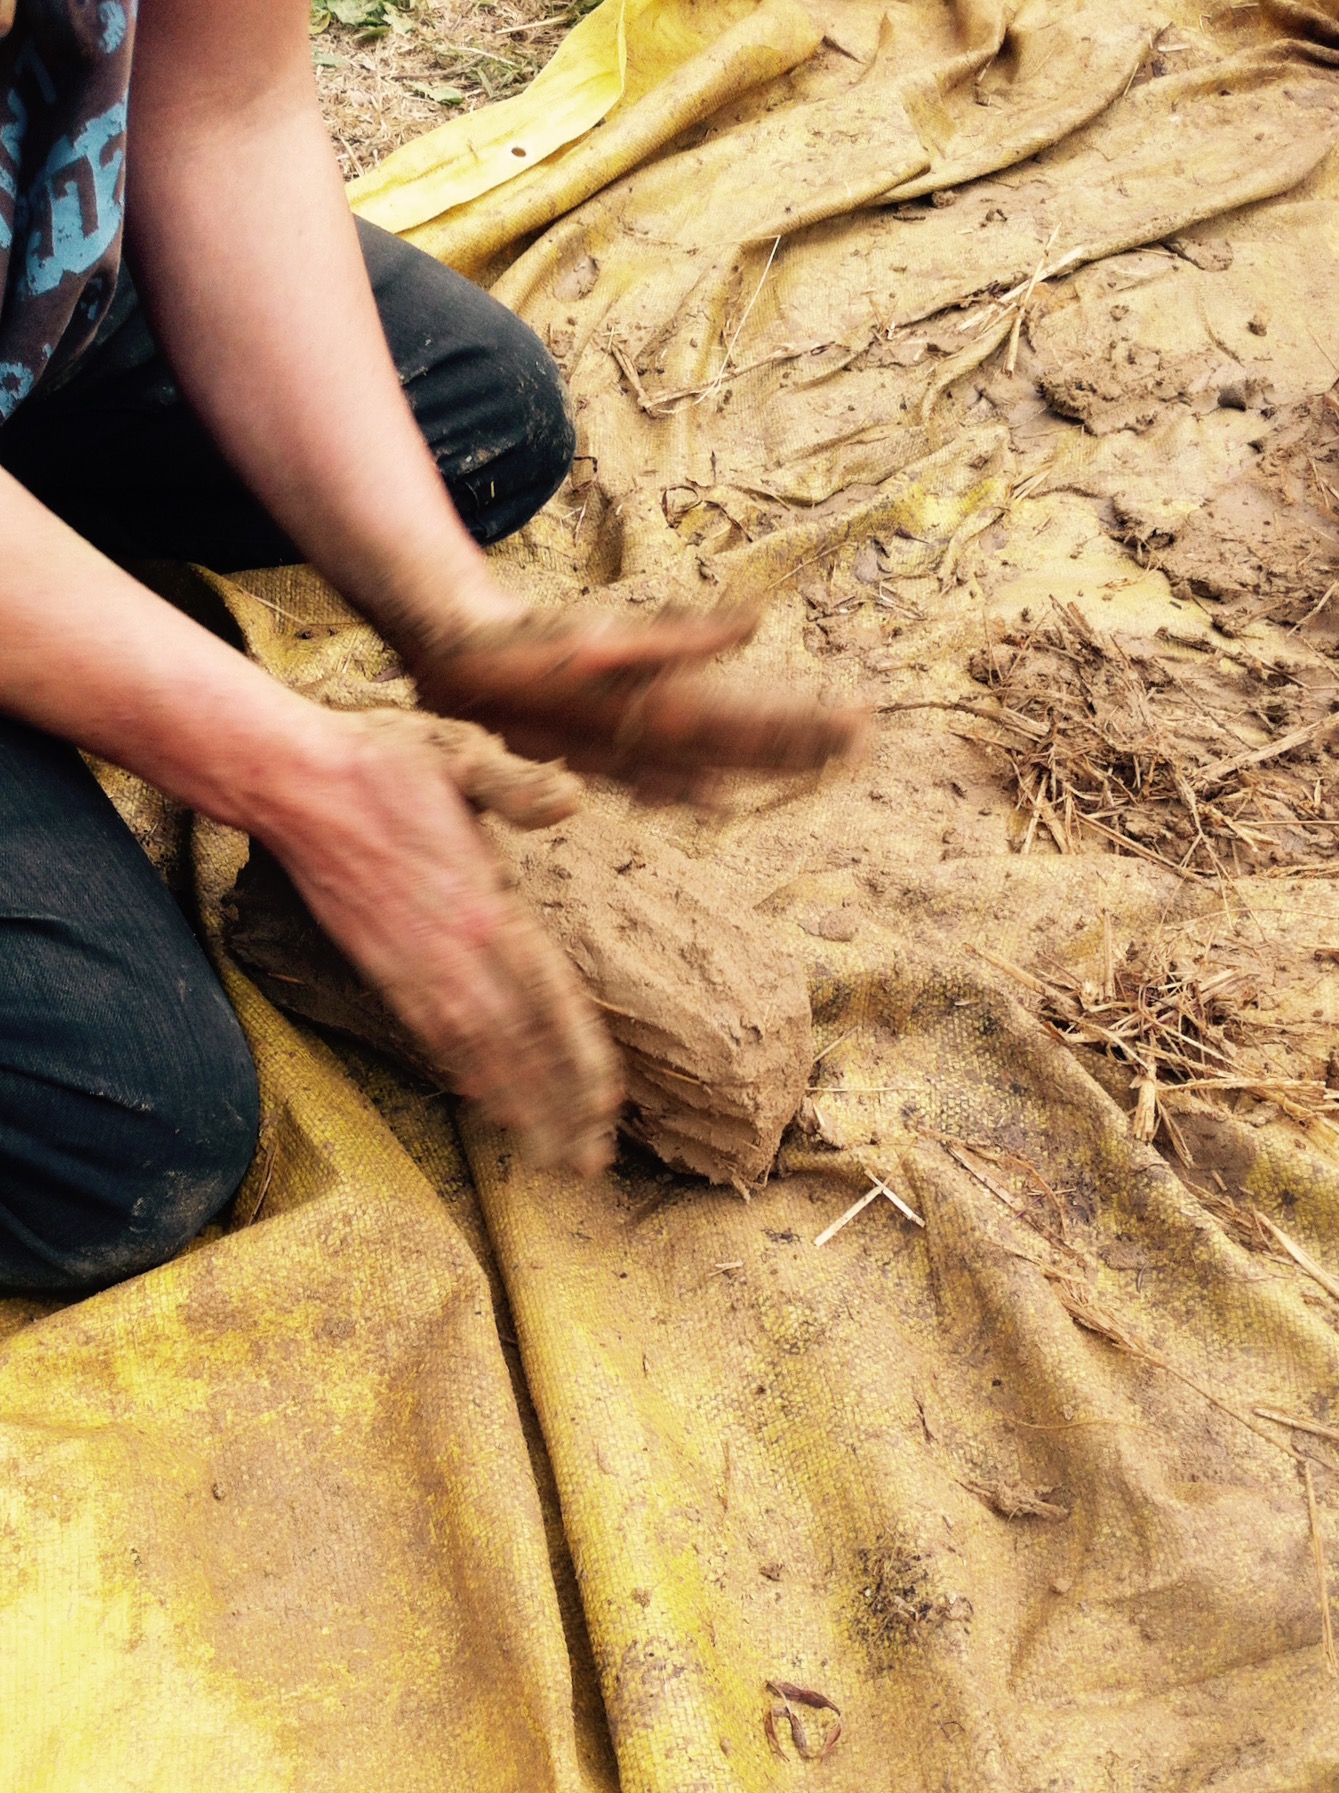
Making the bricks (balls)
make sure each new layer remains the same consistency and is wet enough. A good team is a great idea as once you have all finished making the cob mixture, one person can make the bricks, one can mould the bricks onto each other and another use a trowel to smooth out the layers. We might suggest you have one more person to make the lunch, as you will all be pretty buggered and dirty before long!
Cut out the Door and empty! When your final coat is semi dry (a few days in our case), carefully cut the shape of the door out. Then if the cob structure seems to be holding firm, scoop out the sand/clay mix from the inside of the oven.
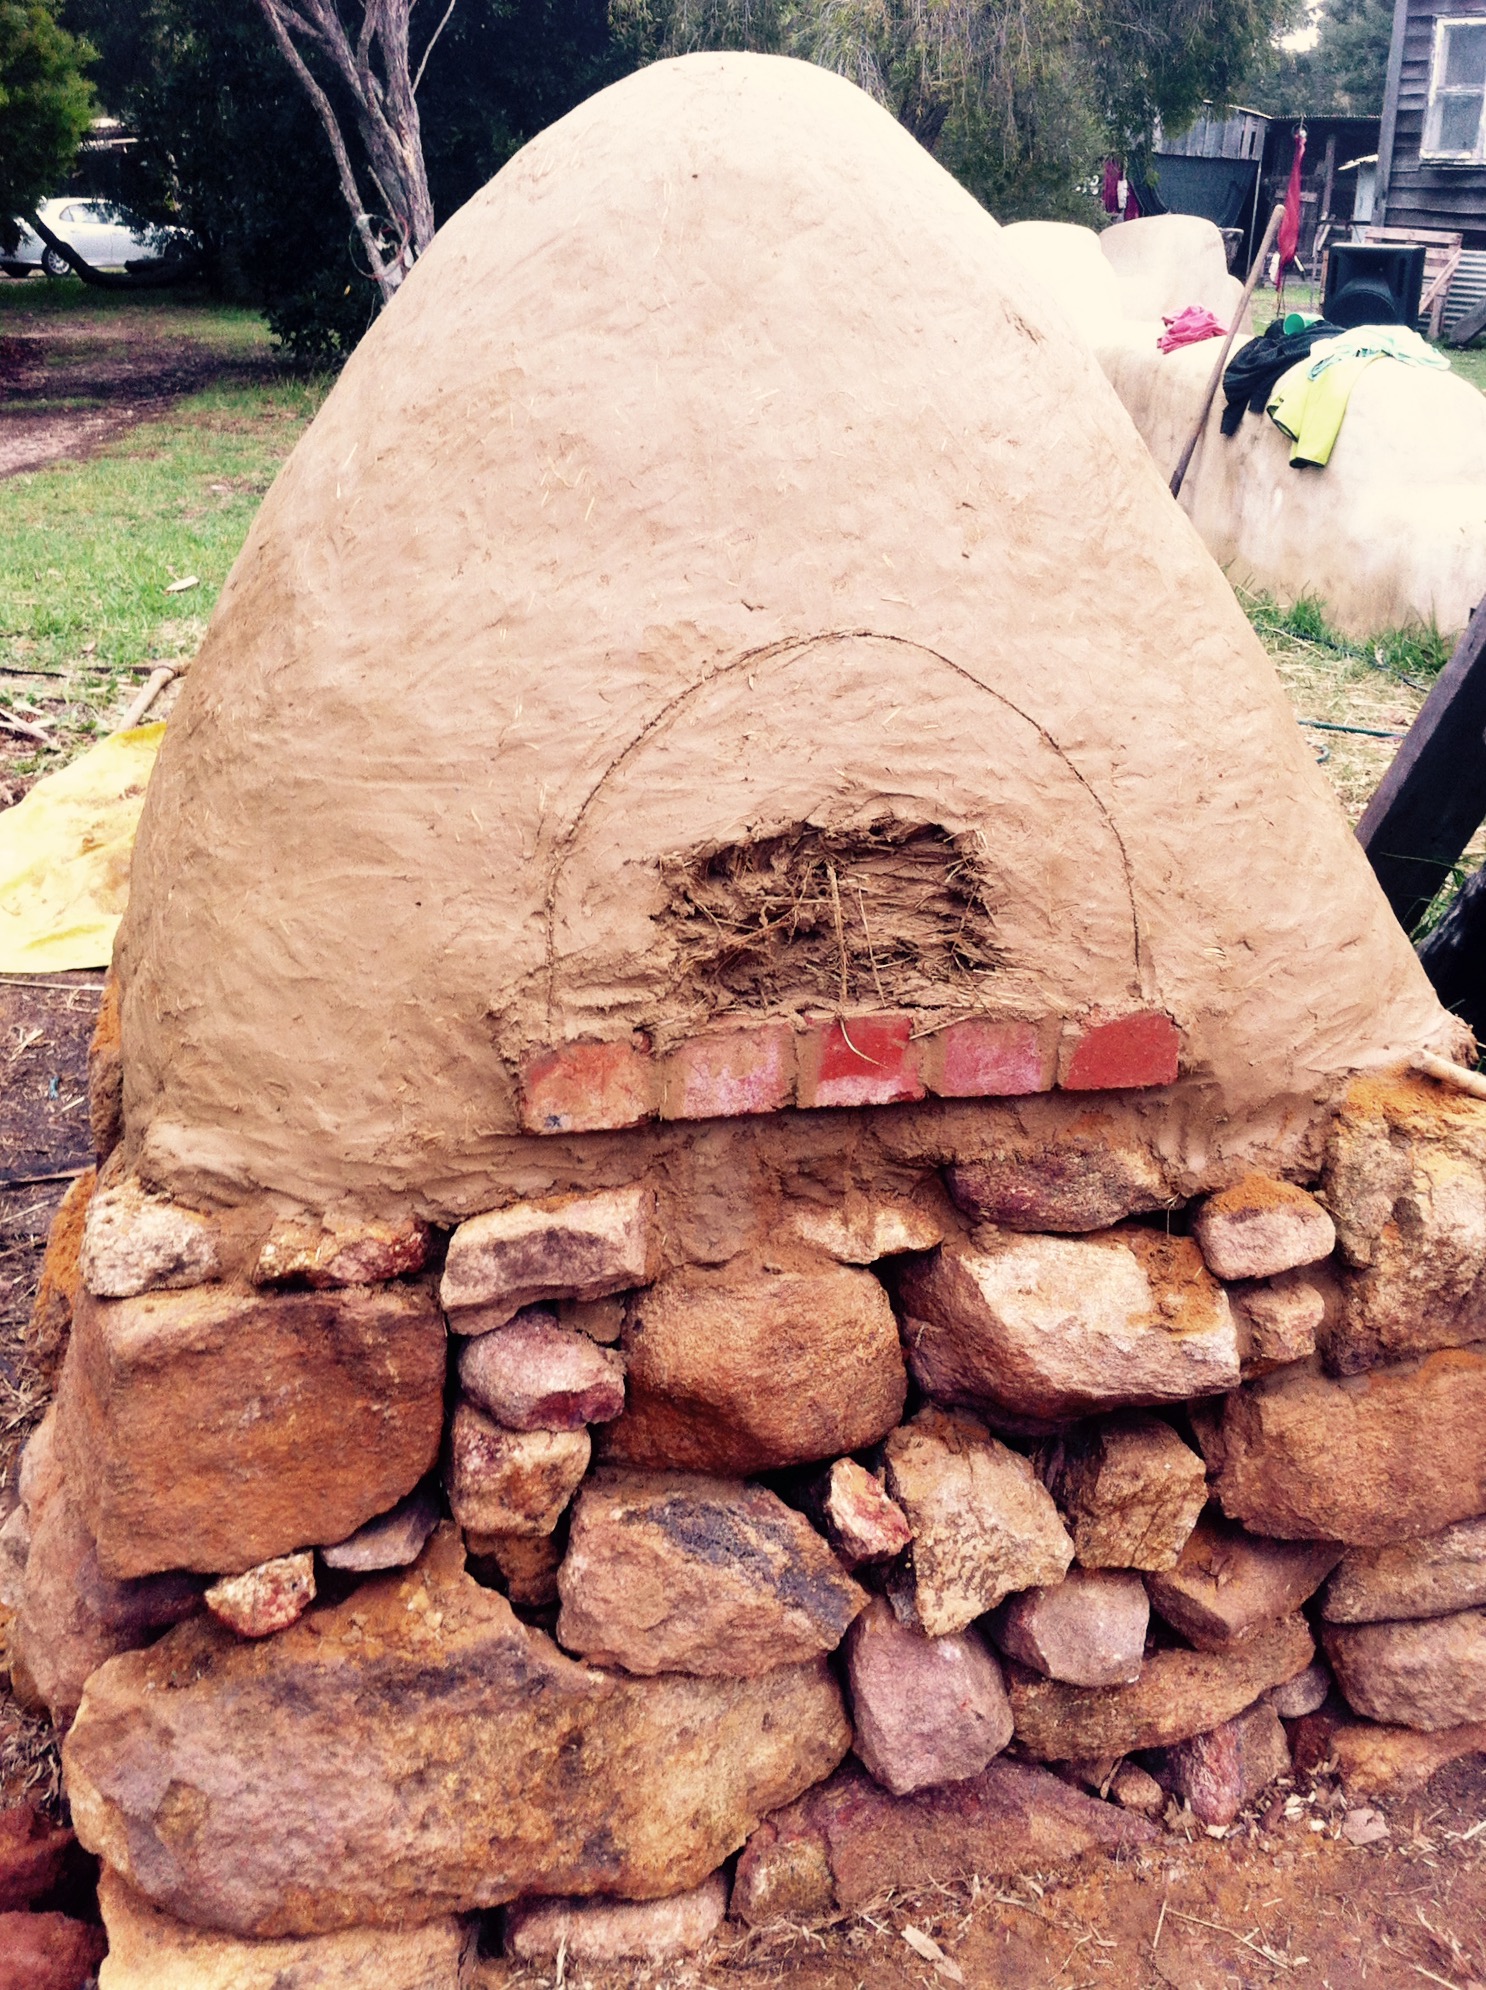
Cutting out the door
Build a good solid door to plug the entry
Render to finish We decided not to build a roof on the top of our oven, instead we chose to use two coats of lime render to finish and seal our oven. The oven still needs to be protected from the hard winter weather if it to last, but by not using cement it will be easy to maintain by applying a new coat of render!
Be patient…..your cob oven needs to dry slowly. Don’t celebrate with stoking it up and making pizzas. Let it sun bake from the outside and build small fires or place hot coals inside for a week or so in order to make sure it is ready for a good hot fire.

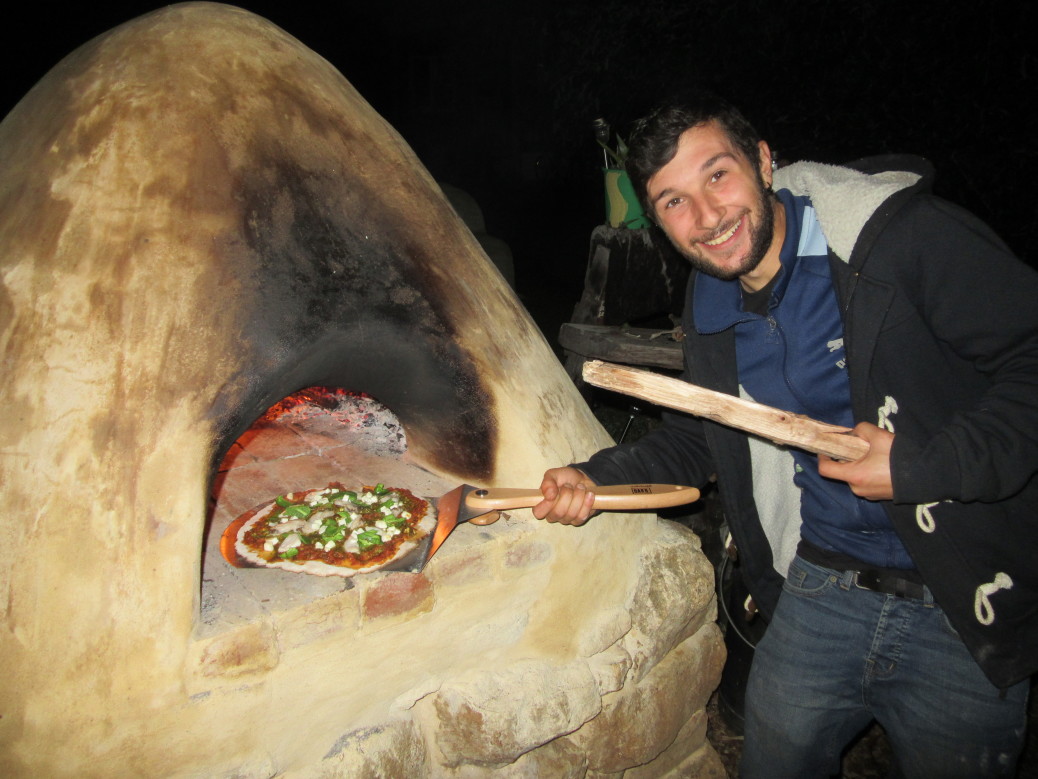
The first pizza!
Celebrate! With a good hot fire and a pizza night with all your helpers!
Overall, we are pretty proud of our oven, using no chemicals was the objective. Everything we used was sourced from the farm and left over materials from other projects (sand and lime) and best of all, we left a tiny carbon footprint…..
The cob oven cooks with all 3 heating methods: convection, conduction, and radiant heat, thus, cooking your food quicker and more thoroughly! Not to mention the unbeatable taste of food cooked by a wood-fired oven!!! It will allow us to cook in it millions of yummy things


Need to do this for sure!